
Entries in Equipment (39)
Building A Kids Mountain Bike | Dream Homework
The family that bikes together...well, has FUN together! It's that time in our kids lives when we want to start looping them in to our passion...riding in the woods on fat tires. Problem is, the state of (really) small mountain bikes is a difficult one. It's not a very big market and rightfully the manufacturers mitigate their risk by not producing a ton of options. Buying off the shelf bikes for kids who are 'tweeners' (too big and advanced for off the shelf bikes and too small for 'adult' sized bikes) is really difficult but we were determined to get it done right for them. I want to ensure my kids could really 'feel' and control the bikes...so that meant careful choosing of frame and parts alike. WIth the help of Boulder Cycle Sport and some of my great friends and long-time industry honches, we were able to source and build up the following for the youngsters:
- Kinesis 'label-less' frames - 14" for 26" wheels
- Carver ridged carbon fiber front forks
- WTB wheels (tubeless)
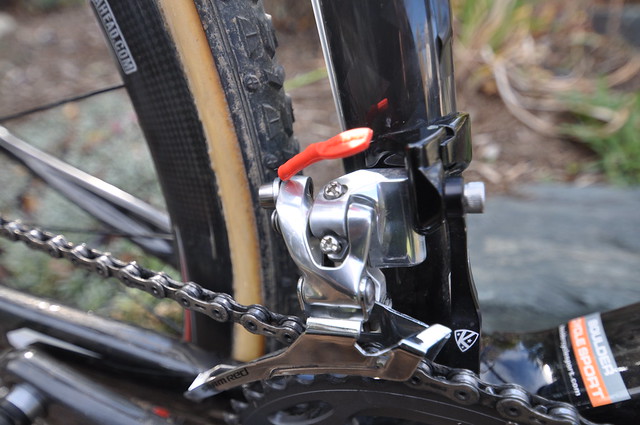
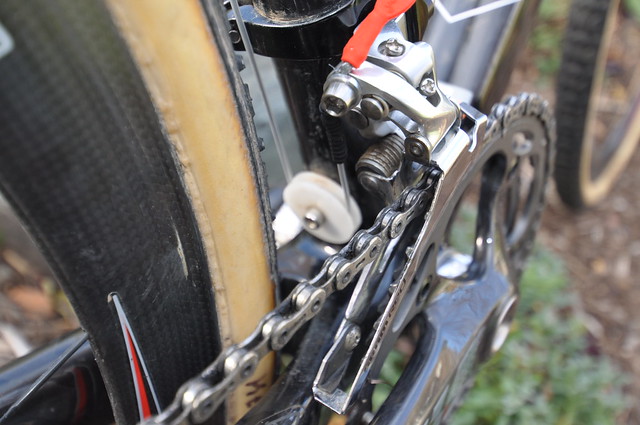
- Shimano SLX group set
- 60mm stems & flat bars
- Old seat posts lying around
- Kenda rubber
- ESI grips ('suspension'...yes, these boys will learn tire pressure before suspension use)
- Cane Creek headset
Bikes came in about 17lbs and I can still move into lighter territory, but that will be the fun part. Some porn...


 Greg Keller
How to extract a stripped cycling shoe cleat
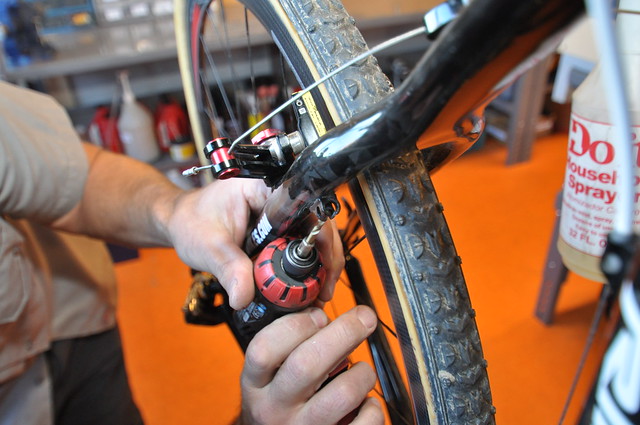
It never ceases to amaze me, the inventive tricks the service staff at Boulder Cycle Sport have up their sleeves. I was in a pickle with a perfectly good pair of Mavic Furys...with the exception of a stripped cleat. I polled my internet friends with a tweet and I got many great responses...
Tips for getting a stripped/stuck bolt out of a cleat? Go internet! cc: @angryasian
— Greg Keller (@mudandcowbells) March 15, 2013
But my man Zach Edwards at BCS had the cure. And it took exactly 30 seconds. Let me show you how he solved it.
Step 1: Here is the problematic bolt. Even with grease, over the past year the bolts seized to the mounting plates. I was able to get one out...

Step 2: Zach finds the right size drill bit that is just slightly smaller than the diameter of the whole head of the bolt.

Step 3: Braaaap! He drills straight through the head until it releases the cleat, leaving the bolt still in the plate.

You can see how the head sheared off here....

The remaining steps were simple: We pulled the plate out of the bottom of the shoe through the trap door access inside the shoe, under the sole (most good shoes have this access point.) Zach then used vice pliers to grab hold of the remaining bolt in the plate and twisted it right out! Bam! Total time was 30 seconds.
I reinserted the plate, greased up the threads and got my new cleats on. Like new.
Great tip from Zach and one anyone can do with a simple drill and bit.
The Sidi Drako vs Sidi Spider | Which is the better cyclocross shoe?
Next to cyclocross tires, choosing the right shoes for cross is widely known as the 'next biggest religious debate'. Well, maybe slightly behind the Seattle-vs-Boston-vs-Boulder-vs-Portland regional debates. Cyclocross is a unique and demanding discipline of cycling, requiring the pilot to be on and off the bike frequently throughout the duration of a race...well, unless the course has been Starbucked. In other words, demanding as much pedaling efficiency as running agility and efficiency.
Sidi has been an institution of cycling for eons, and when it comes to Elite-level competition, you will see an armada of the Italian shoe-maker's products outfitting the world's best on the most famous battlefields in the sport...from Koksijde to Kentucky. Their off road product range is very diverse, ranging from the price conscious, to the price unconscionable. For 2013, the new Drako (MSRP $449.95) replaces their long time elite-level shoe, the Dragon, and the Spider (MSRP $349.95) is back as their more price-conscious stalwart. I wanted to look at them both carefully for the application of cyclocross. To really get to the bottom of which shoe would perform and serve 'crossers the best in all capacities from price to performance. Here's what I found out...
 Both the Drako (say 'DRAY-ko') left, and Spider, right, fit extremely well. The material used on both uppers (Lorica) is weatherproof, cleans up easy in mud, but
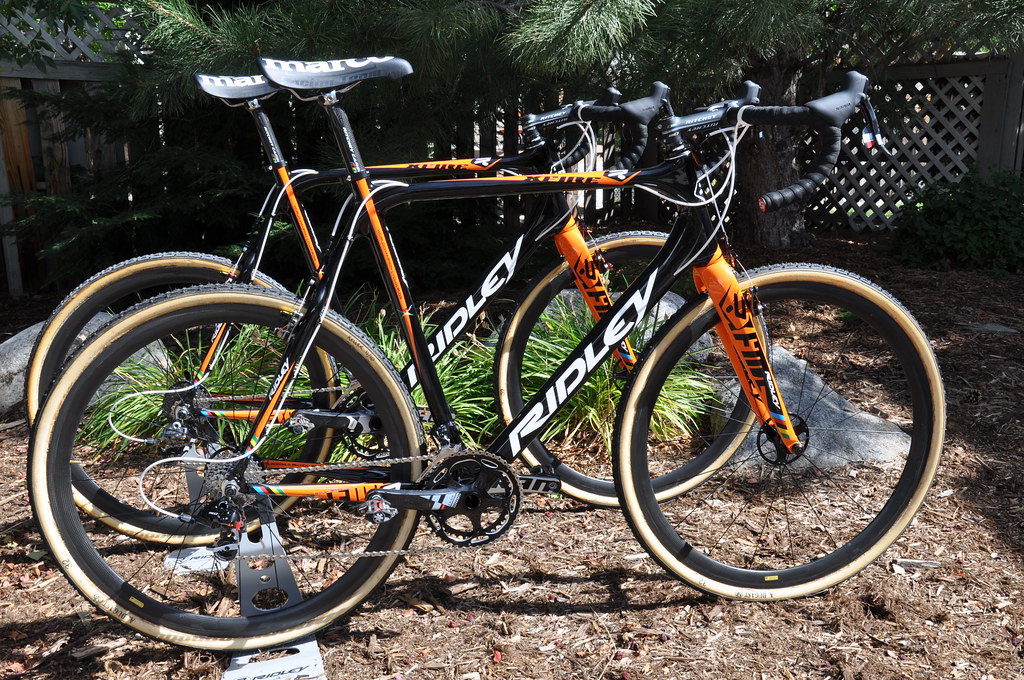
New 2014 Ridley Cyclocross Frame | To be announced in Louisville!
My friends at Ridley pointed me at this picture this AM, I assume to whet my appetite on Joachim Aerts and Co's new creation. It's a new MY2014 frame the Sunweb-Napolean Games riders (namely Klaas Vantornout and Kevin Pauwels) have been steering, to some impressive results in the kerstperiode in Belgium these last few weeks.

Possibly one of the most amazing photographers covering the CS scene in Europe is Kristof Ramon. Check out his stunning images here, but below he captures Klaas aboard the new Ridley:
 The Sunweb team have been on Ridley's finest for some time...mainly aboard the workhorse X-Night for many generations. But look closely...no seat mast, Cervelo-esque needle-thin down stays, shaped top tube and thinner profile fork. Something tells me this is their new flagship...ultralight and ultra racy.
To be announced in Louisville, KY at Worlds. Stay tuned....
2013 Ridley X-Fire Disc Technical Questions Answered!
Lots of questions and general excitement for disc brakes this coming season! The Boulder Cycle Sport Ambassadors are completely amped to get our X-Fire discs built up, dialed in and raced. I had a few great questions from a friend, Josh, about the 2013 X-Fire disc, and I sourced some answers from Todd Schmidt of Ridley USA....
What is the weight of the frame/fork of the X-Fire disc?
Todd: The Frame is 1275g and the fork is 460g. The fork has been re-enforced for the demands of disc brakes.
Can you put 160mm rotors on the rear or does it only fit 140mm?
Todd: We have the rear designed around a 140mm rotor but it may be able to be modified to accomodate a bigger rotor.
I ride a 56 road bike, am about 5'11", I currently ride a Scott Addict CX (56) with a 110mm stem, what size Ridley should I ride? 54?
Todd: Possibly the 52 or the 54. Please consider the top tube length and the head tube height as well the standover height and your specifics when finding the right size for you.
I see Ridley are running Hayes CX5 brakes, are those as adjustable as the Avid BB7s? I don't see much in terms of reviews for the Hayes brakes.
Todd: The Hayes brakes are very adjustable, yes. More adjustable. We have found the CX-5 to be a versitile brake both in terms of adjustability and performance and thus have spec'd it on all our disc brake built bikes.
Here Todd talks about the X-Fire disc lineup at Dealer Camp...
Mavic pour le tarmac

Time to un-make the donoughts...the ones that are helping gravity at the moment.
The Ridley 2012 X-Fire | SRAM Red Black in the House
In 2007, I remember distinctly when Brandon showed up at a Wednesday Worlds on a Time cyclocross bike with brake levers made from carbon fiber. “Dude, you’re riding Campy?” I said as they were the only products we’d seen at the time with carbon levers. “No, check these out! New from SRAM. It’s called Force.” And so the relationship began with the company and before we knew it, we were ALL on the groups. I’d never seen anything like it before in terms of adoption.
Fast forward and SRAM has played a major role in the Boulder Cycle Sport Ambassador’s team success. Multiple National Championship wins (4), State Championship wins (2) and countless podiums, crashes, mud-fests, gear changes later, and we’re still shifting to success with SRAM.
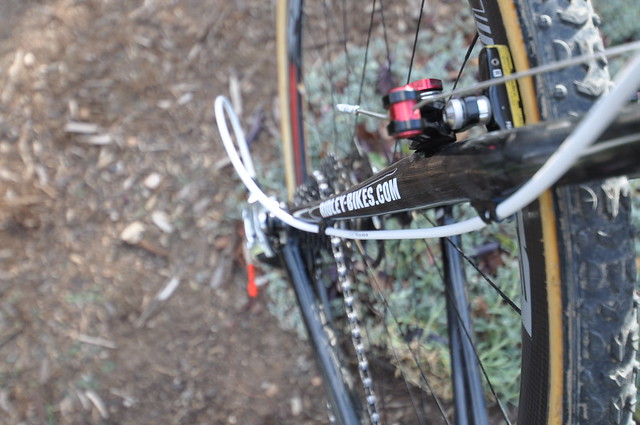
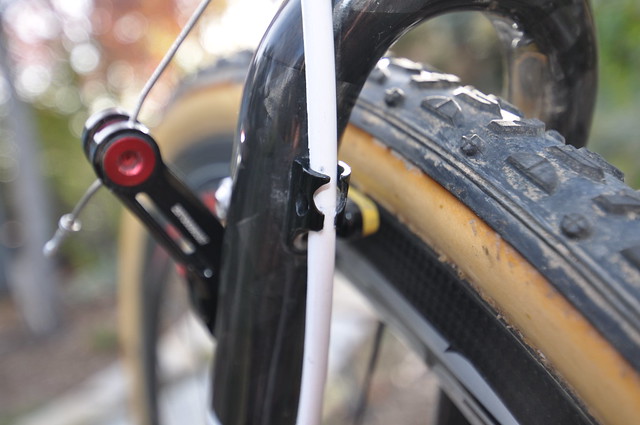
This year SRAM has a new twist on their top of the line group, SRAM Red. The twist is to black it all out! The BCS team’s “A” bikes are all dialed in with SRAM Red ‘Black’ with “B” bikes being equipped with the Force group. We finally have the bikes together and a few races under their belts, and before they get sullied with the wear and tear of a season, I wanted to show the Ridley X-Fires in a state with their SRAM bits hanging in their miraculously-clean splendor.
The 58cm Ridley X-Fire complete with SRAM Red,
A Quick Preview of the BCS 2012 Ridley X-Fire
More blog posts, photos and details forth coming on these unbelievable steeds but I was excited to show one of the team bikes built up and ready to rip. Huge thanks to Ridley Bikes, SRAM and Ritchey. Clement tubulars coming soon!
The Gore RideOn Sealed Cable System
My good bud and master’s racing compatriot Michael Robson assembled a great article on VeloNews walking through us all through his experiences with various sealed cable systems, their merits, installation tips, etc. I highly recommend having a look-see at his write up as the weather is quickly changing and before we all know it we’ll be knee deep in the good stuff: mud. You best hope you have great shifting performance before then!
The Boulder Cycle Sport Ambassadors Team has some great sponsors including Gore who have us all on their new RideOn Sealed Low Friction Brake and Shifting Cable System. I wanted to walk you through this system and some of the installation ‘upgrades’ we have done to ensure optimal performance in the worst of conditions.
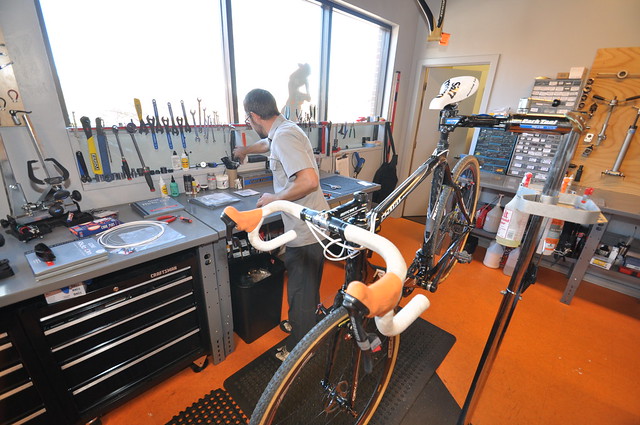
For those of you that do not have the time, skills or some of the equipment involved (and are local to Boulder area), Boulder Cycle Sport has the installation of this system completely dialed. Contact BCS for details and pricing. I opted to walk you through in photos of how one of Boulder Cycle Sport’s finest mechanics, Steve ‘Shelpy’ Shelp, dialed in my Ridley X-Night with this new cable system.
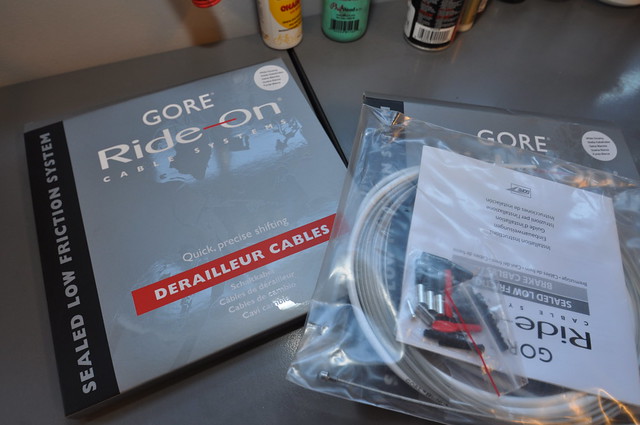
The new Gore RideOn sealed system includes almost everything you’ll need…except for the heat-shrinkable seals which will be talked about below. The system’s marquee features are its continual sealing along the entire length of the cable, making the action silky smooth (frictionless) as well as the GRUB™ Seals to prevent virtually anything from contaminating the sealing and degrading the cables performance.
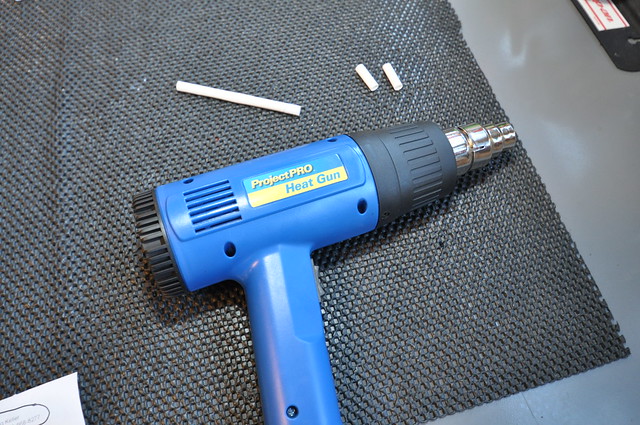
A heat gun and heat shrink tubing (which can be picked up at most good hardware stores) was used in Boulder Cycle Sport’s installation as an ‘additional’ method of sealing insurance.
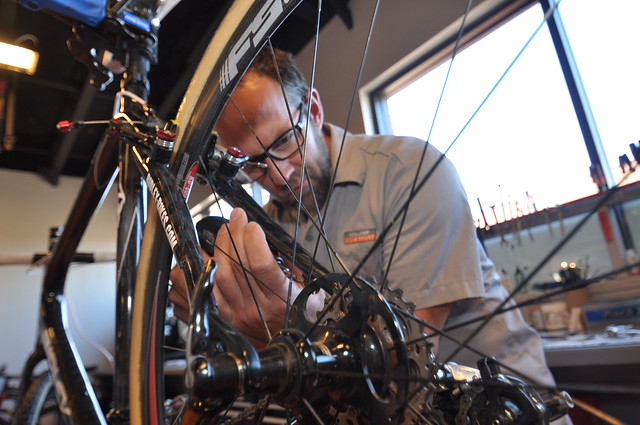
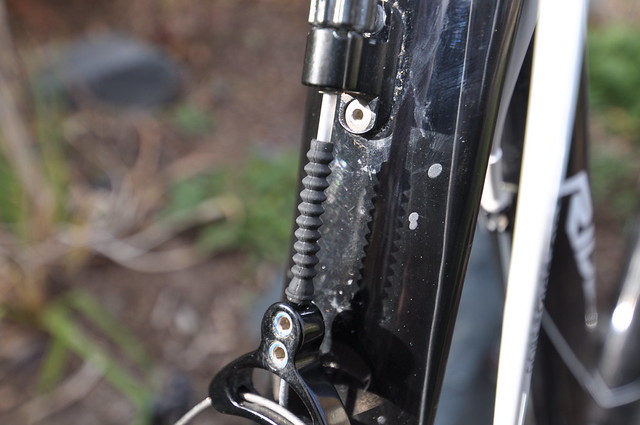
Shelpy is drilling out the cable stops so that he may run one continuous piece of housing from the top tube straight through to the derailleur. Note: when this is done, you will be using more of the housing than is provided with the RideOn kit. We used an additional piece of housing from another non-RideOn kit for the front derailleur…literally boring it out so that it would accommodate the thicker width of the sealed housing of the RideOn cables. Be advised.
Another view of Shelpy’s handiwork…carefully boring out the stops.
Shelpy’s den. Cleaner than a surgeons operating room.
The finished result. A super tight cockpit.

Note the heat shrunk wrappers right at the beginning of the ferrules to prevent any possibility of dirt entering the ‘system’.
You can see the front brake cable exit the stop and it’s 'sealed ‘casing’ extending all the way to the base of the hanger…where a grub seal has been placed to prevent any contamination.

Another view of the heat shrunk wrapping at all stops.
The cable ends are topped with RideOn’s own stops to protect from fraying and elongating the life of the cable itself.
Shelpy’s handiwork included thoughtful touches like the zip tie you see here to ensure the cable end does not flop around. This will also allow me enough cable should I re-position the Avid brake arms to their ‘wide’ position.
A view of the fully sealed front derailleur cable around the spindle, its grub seal and cable end.
The rear brake where you can see the sealed housing and grub seal in tandem.
A view of the continuous cable Shelpy installed straight through the bored out cable stops.
A close up of how this stop looks with the cable running through it.
Finally, the rear derailleur with the sealed cable poking out...completely sealed from end to end (Note: grub seal has been placed at the exit of the cable since taking this pic.)
The 2011 Ridley X-Fire | Back in black
Almost two years ago, Dubba and I were out on a ride, discussing all things cross (which is an every day occurrence and usually doesn’t even require a ride…) and we started talking bikes. “What brand do you think resonates with cross?” he asks. “What would you want to ride? Products that are absolutely cross-specific. No gimmicks.”
My answer was one word, two syllables:
“Ridley.”
And so, it was done. Boulder Cycle Sport engaged with QBP and the Ridley Brand and fairly quickly, ratcheted-up sales of cross bikes to passionate folks. Simply put, customers ‘got it’. They see the Ridley products and they ooze speed, agility, mud shedding…they ooze Belgium.
Last year the Boulder Cycle Sport Team rocked the X-Night, an amazing, awe inspiring piece of engineering, Internal/fully sealed cabling ensured I literally never changed my cabled the WHOLE season. The integrated seat mast kept things stuff and fast. See my posts here about the X-Night experience.
And so in this 2nd year of carrying the product, the Boulder Cycle Sport Cross Team has a yet again an amazing opportunity to race their 2011 X-Fire product. I’ve just got ‘er built up, so let me take you through the highlights:
- All carbon frame and fork, roughly 1400 grams (mine is a 58)
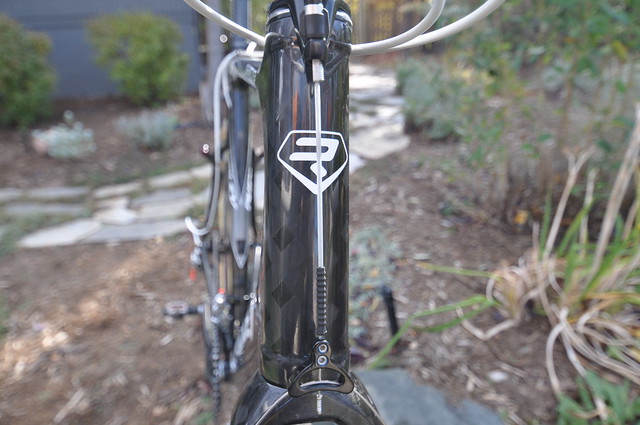
- Super stout 1-1/8 to 1-1/2” heat tube/FSA head set.This is a new change for the 2011 X-Fire taking on this attribute from it's sibling, the X-Night.
- Traditional seat post (31.6) versus the seat mast the X-Nights have.
- Replaceable rear drop out.
As for the grouppo, again, an amazing array of sponsors help the team with equipment to stand the absolute extremes we face during cross.
SRAM/Avid
- SRAM Red drive train including sealed RideOn cabling. We’ll be opting for 12/26 Force cassettes however due to their mud shedding abilities. 46/38 rings on the crank sets.
- Avid Ultimate Shorty brakes. These are just so flipping amazing, I will devote a post for them specifically. Stay tuned.
Ritchey:
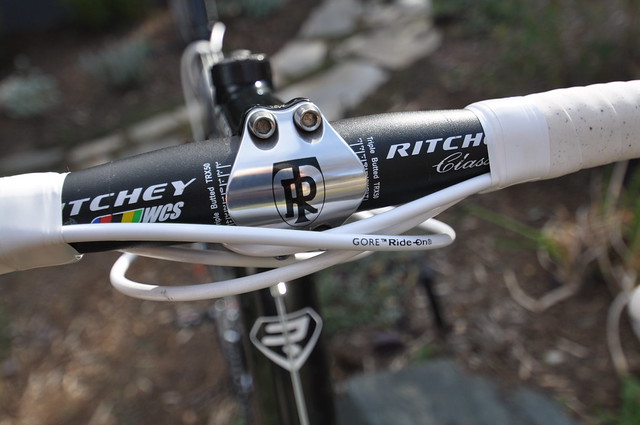
- Bars: WCS Classic bend
- Stems: WCS 4Axis Wet black.
- Seat Posts: WCS no set back carbon single bolt.
Wheels are all personal choice for the Team, so I will use a mix of FSA RD 800 and 488’s with a blend of Dugast rubber. Mainly Typhoons but we have Rhinos as well this year for the badness should she come. And she will.
Here is the bike built up. Just about 17.5 lbs in my large/man sized bike. Enjoy. More reports as I get more saddle time and if you are my size, ask me to ride it!
Katie. She's more artist than anything. Details the bike with love.
The bike all built.
SRAM Red cockpit with Ritchey Classic bend bars.
SRAM Red cranks and my trusty Time ATAC pedals.
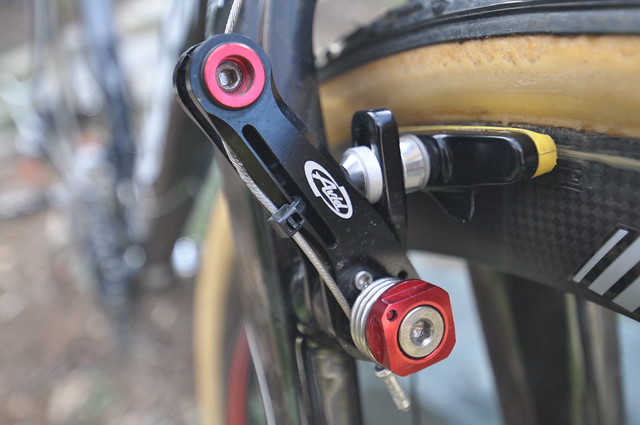
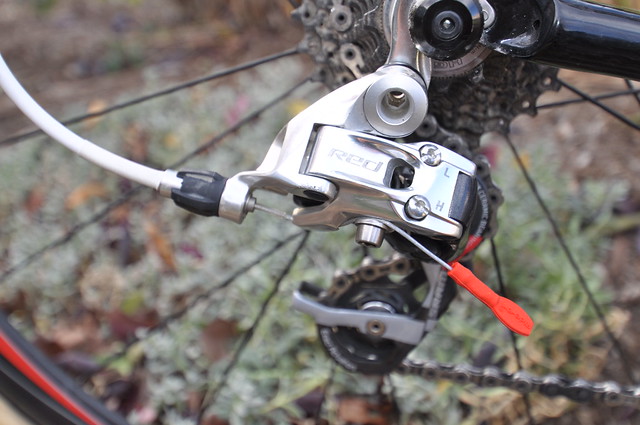
The engineering artworks themselves: SRAM/Avid Ultimate Shorty brakes (front)...
...and the rear brake.

Massive mud clearence for our now '33c limit' tires (My 34 Rhinos fit just fine)
One extremely clean cockpit.
